
So this post was started in June…we are now towards the second half of August. I am SO sorry for the delay. Summer has a way of getting away from you and has a tendency to be over programmed, overly relaxing, and focused entirely on sunshine, water sports, and adventures. (All things I’ve been busy with, not to mention it’s been entirely too hot to turn on the oven.) So without further ado, my first post in months…I hope to get back on the horse!
As many of you know Top Chef is one of my favorite programs on TV. It’s got a great balance of reality based TV drama and creative cooking. Not only am I fascinated with how these Chef’s minds work, but the plating skills and the fan fare of the food leave me salivating and the wheels in my head turning.

Top Chef Finale Party circa 2007
Recently we experienced the Top Chef Masters Finale. I find Top Chef Masters
 even more interesting than regular Top Chef because the caliber of cooking is out of this world and the precision is just amazing. In the finale, the final meal the Chefs have to cook for the judges is 3 courses – 1st course represents their first food memory, 2nd course represents what propelled them to be a chef, and 3rd course is indicative of their food point of view.
The way we were raised, a lot of my memories are food infused. Family dinner happened every night at our house as well as spending tons of hours in our Abuelita’s kitchen when we were kids. But the thing I looked forward to every week when we were kids was the weekends. It wasn’t because we sometimes ordered pizza for dinner or because we had big family breakfasts where my mom broke out the waffle iron or made delicious omelet like scrambled eggs (that I still can’t replicate), but because we would run errands with my Papi (spanish for dad) on Saturday or Sundays. These errands would consist of buying the newspaper, going to the butcher, AND going to the bakery. The bakery was my favorite part. We would get fresh French bread, fresh rolls, cookies, croissants, fancy pastries; the possibilities and combinations were endless. When I was really little (4,5,6) I there were two items I would always pick from as my treat. One was the star shaped shortbread cookie, dusted with powdered sugar, with a pink, hard glazed icing dot in the center. They were delicious! I would eat all the star’s points first and then eat the center part with the pink icing last (it was the best part). The other one was Madeline’s half dipped in chocolate. Generally I ate the exposed cookie part first and saved the chocolate end for last. (There’s a little bit of a theme here.)
As I got older, my favorites changed. I outgrew the cookie stage and began to crave something heartier from the Panaderia (Spanish for bakery). This may have been due to a palate change, but my best guess is that as I grew older and bigger, one little star cookie and a hunk of French bread would not fill me up for a morning of errands. That’s when I discovered the magic of Croissants, cheese filled Croissants to be exact.
My addiction to croissants began probably around the age of 8. It began being the thing I looked forward to the most about the weekend. I always eat the ends first, because they’re always a little crisper and a little less flaky and the cheese was generally more towards the middle. Sure I would switch it up sometimes, getting a donut or a mini fruit tart, but as much as I tried to convince myself these were the items I wanted to eat, they never left me as satisfied or as pleased as the croissant did.
Croissants are still one of my favorite breakfast pastries. When I spent a week in the UK and Paris, I had Pain au Chocolat for breakfast EVERY DAY! (I was on vacation after all.) When I’m having a bad morning or am just hungry for something different for breakfast, I stop and buy a croissant. If I’m at a restaurant and can order my sandwich on croissant, I will, even if it then becomes a slightly smaller sandwich or has a premium cost. Croissants are bakery Mecca to me.
But croissants are a little pricey. So I got it into my head that I was going to make my own. I had checked out a recipe in Joy of Cooking several years ago and found it incredibly daunting. Croissants were way more serious that I thought. There was no way I was ready for them or could even wrap my head around how to create this flaky, soft, half moons of goodness. Flash forward to 2010, if I can master a hidden flan and make red velvet cakes from scratch – I’m going to make croissants.
So I set aside an entire day off (really – it took me 12 + hours) and got to work. It took one failed attempt to finally gain success. I made chocolate, cheese, and plain croissants and they were good, but they weren’t the same as bakery ones. I was a little disappointed in the texture, they tasted like a flakier Pillsbury crescent rolls , but still closer to a Pillsbury crescent roll than anything else. However, they were good and they were edible and I proved to myself that I am able to make them.
So here are the burning lessons from the croissant experience of 2010:
Will I ever make them again? Maybe in 2011, but not in 2010. And only if I have multiple days off in a row – they were exhausting.
How much money did you actually save? None (especially because I had a bad batch). With the time and energy I could have bought myself a croissant from the bakery, enjoyed it, and done something far more exciting with my day.
Are you glad you made them? Yes, because I like pain. I also like to prove to myself that I can do very difficult things and once I set my mind to it, I don’t give up until I have some sort of acceptable result.
How many people thought you were crazy? Every single person I know.
Would you suggest the masses make these? If you’re dedicated and you want a challenge, try them. If you want to enjoy your time in the kitchen and do not want to start cussing out the rolling pin, make something different. Mad props to those who want to make them – the reward is there, I’m just not sure it balances out with the work.
What did you get out of this? A nice little arm workout from rolling out dough a million times.
Best, most important lesson? If you want to try the croissants – good luck, but don't call me asking for help. If you want to take me out for a croissant – I will gladly accept.
Croissants – Recipe adapted from Epicurious
Ingredients for the dough:
1 ½ cup – heated whole milk (105-110 degrees F)
¼ cup – light brown sugar
1TBSP + ¼ tsp – active dry yeast (2 – ¼ oz packages)
3 ¾ cup – all purpose flour
1 TBSP – kosher salt
3 sticks – unsalted butter, cold
Dough:
Heat the milk in a small saucepan watching the temperature reading with a pastry thermometer. Stir together the heated milk, brown sugar, and yeast in the bowl of a stand up mixer. Let it stand in the mixer until it’s foamy (about 5 minutes). Add 3 ¾ cups of flour and salt and mix with the dough hook at low speed until it’s smooth and soft (about 7 minutes).


Knead the dough by hand for two minutes on a very slightly floured surface. The dough should be soft and slightly sticky. Form the dough into a 1 ½” thick rectangle, wrap in plastic wrap, and chill for one hour in the refrigerator.

Butter:
After the dough has chilled for an hour, arrange the three sticks of butter horizontally, on top of a large piece of parchment paper on your work surface. Make sure the sides of the butter are touching each other. Put another piece of parchment paper on top of the butter, so it’s in a parchment paper sandwich. Give the butter a couple pounds to soften it a little. Alternate between pounding and rolling the butter. (The butter’s cold so it’s pretty hard. You have to put a little muscle into it.) As the butter is pounded and rolled it becomes a little softer and starts to blend itself together. Keep pounding and rolling until you create one large ‘slab’ of butter in the form of an 8” x 5” rectangle. Take the butter, in it’s parchment sandwich, and chill it in the fridge while you’re rolling out the dough.


Roll Out One:
Unwrap the dough and roll it out on a lightly floured surface. In a combination of rolling and stretching (like pizza dough), roll it out until it’s a 16” x 10” rectangle. (I used a t-square, sharpie marker, and piece of parchment to make a 16” x 10” guide for myself. I wasn’t able to get it to the exact size, but I got it close enough.)
Move the dough so on of the 10” sides is facing you. Get the butter out of the fridge and remove it from it’s parchment sandwich. Place the butter in the center of the dough with the 8” side facing you. Fold the dough into thirds over the butter (like you would fold a letter). Brush off the excess flour with a pastry brush.


Roll Out Two:
Immediately, turn the dough so the short side is facing you. Flatten the dough slightly by pressing the rolling pin horizontally across the dough. Roll the dough into a 15” x 10” rectangle. When you’re rolling, roll just to, but not over the ends. Roll applying equal pressure, but gently so you don’t tear the dough. If butter starts to pop up through the dough, stretch some dough over it to cover it up. Brush off the excess flour with a pastry brush.

Fold the dough into thirds again (like a letter). Stretch the corners so that it froms a 10” x 5” rectangle. Securely wrap the dough in plastic wrap – wrap it tight – and place the dough in the refrigerator for an hour (or the freezer for 20 minutes if you’re impatient like I am).
Roll Out Three, Four, and Five:
Roll the dough out three more times into a 15” x 10” rectangle. Fold it into thirds, like a letter. Wrap in plastic wrap and refrigerate for an hour between roll outs (or freeze for 20 minutes).
Croissanting and Shaping:
After the dough has been rolled out the fifth time and has chilled for the appropriate amount of time, remove the dough from the refrigerator or freezer and cut the dough in half. Keep one half on the counter to work with, the other half, wrap in plastic wrap and stick in the refrigerator while you work. (You’ll be able to see the flaky layers from all you’ve rolled out and folded.) (This dough will be called Chill Master.)


On a slightly floured surface, roll out and stretch the dough to create a 16” x 12” rectangle. Brush off the excess flour with a pastry brush and trim the edges with a pizza wheel (or sharp knife) to make it perfectly rectangular. The 12” side of the dough should be facing you. Cut the dough in half horizontally and chill one half of the dough while you’re working with the first half. (This chilled dough will be called Chill Minor.) With the remaining half of the dough, cut it vertically into thirds making rectangles (each section should be 4” wide x 8” high). Cut each rectangle diagonally making 2 triangles (you’ll have six triangles total).


Hold the short side of the triangle in your hand (the side opposite the point). Stretch the dough enough to elongate the point about 50%. Return the triangle to the work surface with the short side facing you. Roll up the triangle towards the point. The dough should overlap three times, as you’re rolling stretch and work the dough. The point should be on the underside of the croissant. Put croissants point side down on a parchment lined baking sheet and give them a little crescent shape. Arrange the croissants 2” apart. Do the same process with the other half of the dough (Chill Minor).
To make them cheesy: When you’re rolling the triangle of dough, place a hunk of cheese on the short end before you roll the triangle towards the point. Make sure that the ends of the dough are sealed. I used hunks of mild cheddar from a brick of cheese.
Rising:
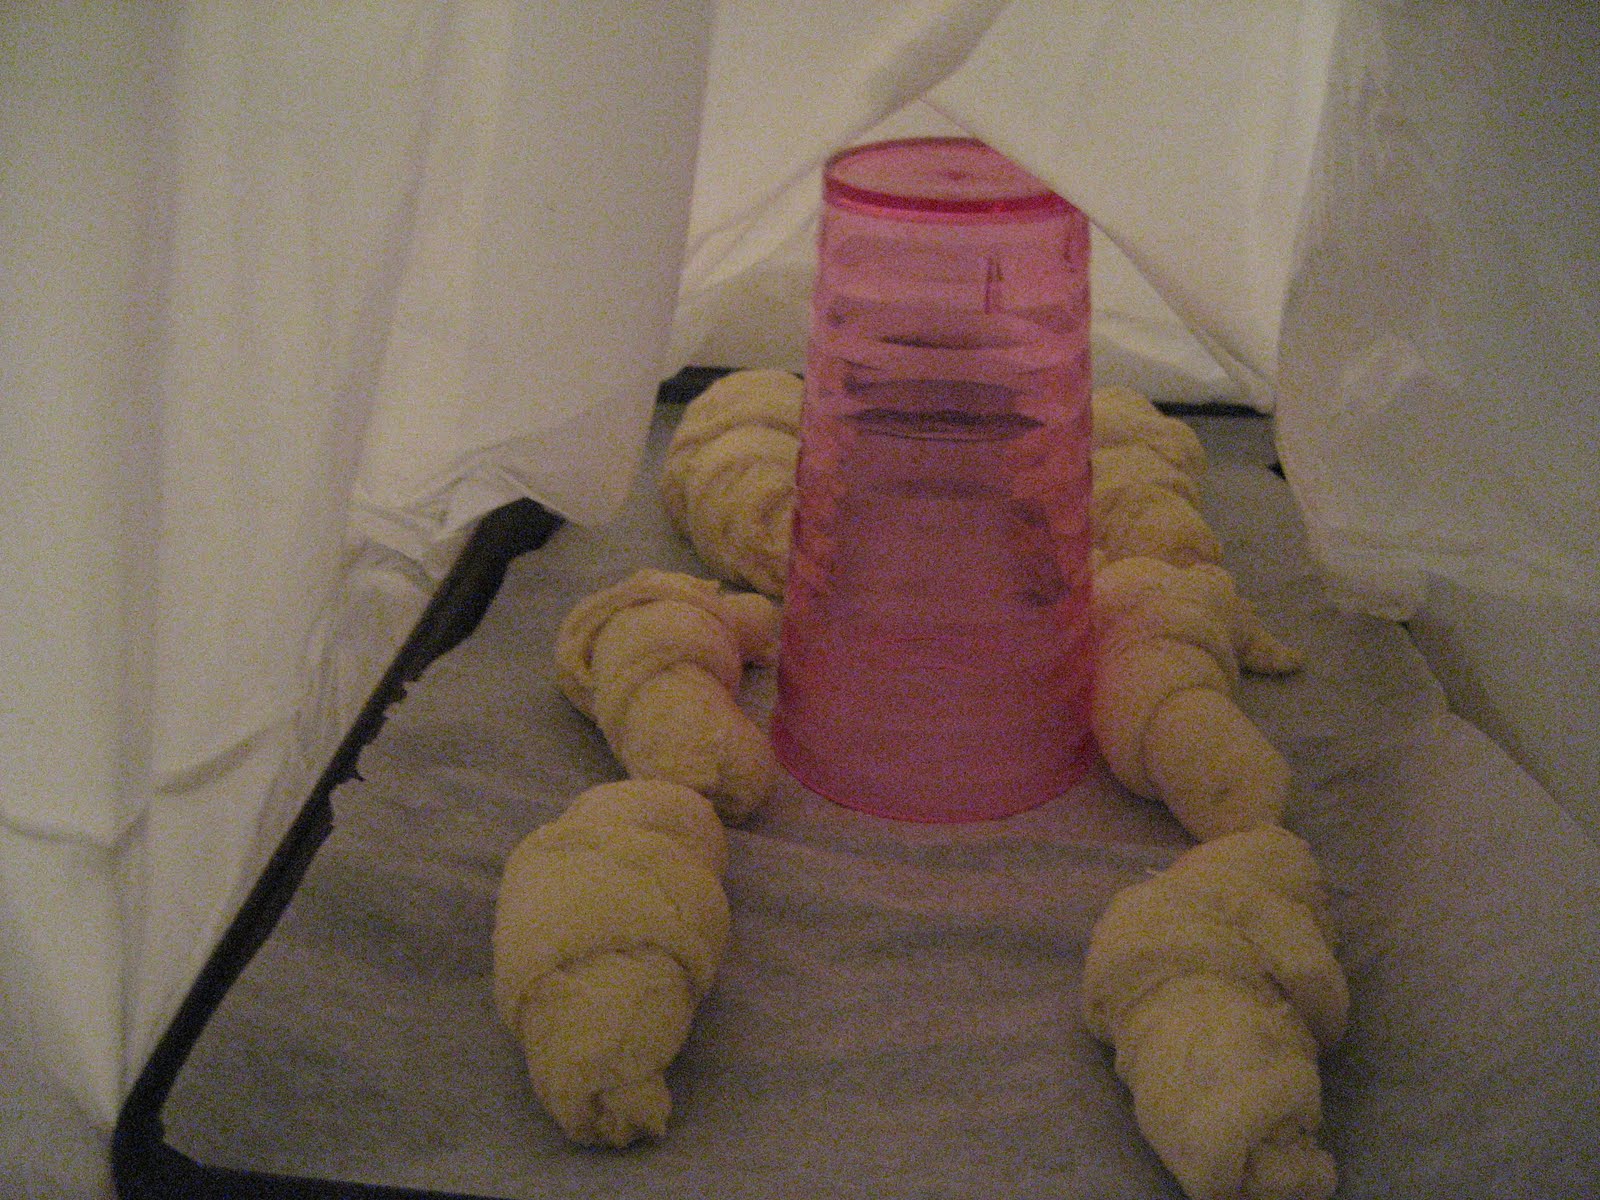
Slide the baking sheets into an unscented garbage back. Tent the garbage bag by placing a glass in the middle of the baking sheet so the plastic doesn’t touch the dough. Tuck the open end of the back under the baking sheet to create a sealed environment. Let the croissants rise for 2-2.5 hours.

Baking:
Adjust the racks in your oven to the upper and lower 3rds. Preheat the oven to 425 degrees.
Remove the baking sheets from the plastic bags. Spritz inside the oven with water and close the oven door. (I didn’t have a spritzer so I just sprinkled water in the oven.) Once the oven reaches 425 degrees again, put the croissants in, spritz the oven again, and reduce the heat to 400 degrees. Bake the croissants for 8 minutes WITHOUT opening the oven door. After 8 minutes, switch the baking sheets positions in the oven (top to bottom) and rotate the sheets 180 degrees. Reduce the temperature again to 375 degrees and bake and additional 8 minutes. If you want them a little crisper in color bake a couple minutes more. Remove the baking sheets from the oven. Let the croissants cool on the pan – don’t touch them until they are completely cool.


Croissanting and Shaping for Pain au Chocolat:
So you still have Chill Master in the fridge after all of this. You can either make more plain or cheesy croissants or you can try your hand at Pain au Chocolats.
Roll the dough out on a slightly floured surface into an 18”x10” rectangle. Cut the dough vertically and horizontally into 4ths (creating 16 - 4.5” x 2.5” rectangles).


For the chocolate I used two Symphony bars and for each Pain I used two of the small rectangles from the Symphony bars. Place the chocolate along the short side of the rectangle (about ¾” from the edge).

Roll the dough up around the chocolate, stretching the dough as you’re rolling it. Place the Pain, seam side down on a parchment lined baking sheet. Arrange 2” apart on the baking sheet.
Tent and let the Pain’s rise 2-2.5 hours. Use the same baking timing, temperatures, and methods as the regular croissants.


Disaster time:
So the original recipe said that you might need to add a little more flour to the dough once you’ve pulled it out of the mixer. My gut told me I didn’t need more flour, but I put more flour in anyway. The dough lost its soft, sticky texture. It felt dried out and lacked the smoothness that you see with other dough’s (you want it to resemble pizza dough). Adding too much flour made the dough very hard to roll out and it kept coming apart in chunks and had no elasticity. It wasn’t feasible to do more than even one roll out on this dough. So I just cut the dough into chunks, let it rise, and baked it. They came out like biscuits. Not terrible, but you could taste a little of the yeast, still salvageable.


Just typing all of this made me tired and if you got this far in reading it - kudos.
No comments:
Post a Comment